Exclusive Online Offer: Free Shipping On Orders Over €90,00!
Press on Nails for Small Nail Beds: How to Get a Better Fit

If you are shopping for press on nails for small nail beds, start with fit, not the tiniest size on the page. A good set follows your natural nail width, sits close to the sidewalls, and still feels comfortable while you type, text, pack, dance, or hold a coffee cup. Small nail beds can be narrow, short from cuticle to free edge, more curved than average, or simply petite compared with standard sizing charts.
The right press-on should look delicate on purpose, not squeezed on or floating past the edges. Here is how to measure, choose a shape and length, decide whether custom sizing is worth it, and pick an adhesive that feels secure on petite nails.
Press on nails for small nail beds: fit rules that matter
Fit starts with width. A press-on should cover your natural nail from sidewall to sidewall without pressing into the skin. Too narrow, and the sides can look exposed or lift faster. Too wide, and the nail can overlap skin, feel bulky, and look less natural. If you are between sizes, choose the slightly larger tip only when you can file the side edges gently before application.
- Width: match the widest part of your natural nail, usually near the middle or lower third.
- Curve: check whether the press-on hugs the nail plate without leaving a big air gap.
- Length: petite nail beds often look balanced with short, extra short, or soft almond lengths.
- Sidewalls: avoid tips that cover skin, because that can make application messy and less comfortable.
If you would rather check before ordering, LuxeClaw’s Press-On Nail Sizing Kits let you test sizes at home before choosing a custom handmade set. This is especially helpful when your thumb, ring finger, or pinky does not match a standard XS or S chart.
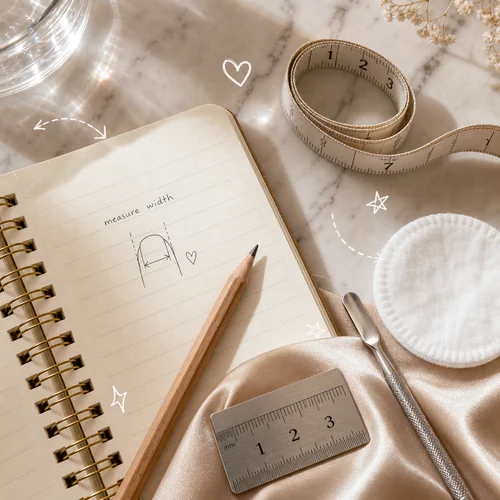
How to measure small nail beds at home
Measure each nail when your hands are clean and dry. Place a soft measuring tape across the widest part of the nail bed, or use a thin strip of paper: mark both sidewalls, then measure the distance in millimeters. Write down all ten measurements. Do not assume both hands match perfectly. Most people have one or two nails that need a different size.
For a visual walkthrough, keep LuxeClaw’s How to Measure Your Nails guide open while you check your widths. If your measurements sit between two sizes, think about your nail shape: a flatter nail may need a different tip than a highly curved nail, even when the width number looks similar.
Shapes and lengths that flatter petite nail beds
Small nail beds can still wear detailed, dramatic designs. Balance is the part that matters. Short almond, oval, squoval, and soft square shapes usually give a clean line without making the press-on look oversized. Very long coffin or stiletto shapes can work for photos, parties, or cosplay, but they may feel front-heavy if the nail bed underneath is very short.
Usually easier for everyday wear
- Extra short round or squoval for typing, school, and daily errands.
- Short almond for a softer, longer-looking finger line.
- Short oval when you want a romantic bridal or Korean-inspired look.
- Medium length only when the tip feels balanced and secure during a dry fit.
When browsing LuxeClaw handmade press-on nails, look beyond the art for a moment. Ask whether the design would still look balanced if shortened or custom-sized. Floral, pearl, gothic, and kawaii sets usually look more polished when the proportions fit your real nail bed.
When custom sizing is worth it
Custom sizing helps when standard sets leave one or two fingers consistently wrong, when your pinky is much smaller than the chart, or when your nail beds are narrow but your thumbs need more width. It is also worth it for a wedding, vacation, photoshoot, or gift, when you want the set to feel right from the first try-on.
A helpful custom-size note is simple: thumb, index, middle, ring, pinky for the left hand, then the same for the right hand. If both hands match, say so. If one nail is very curved or flat, add a short note so the maker understands the fit concern. Clean prep still matters, but accurate sizing removes a lot of the stress.
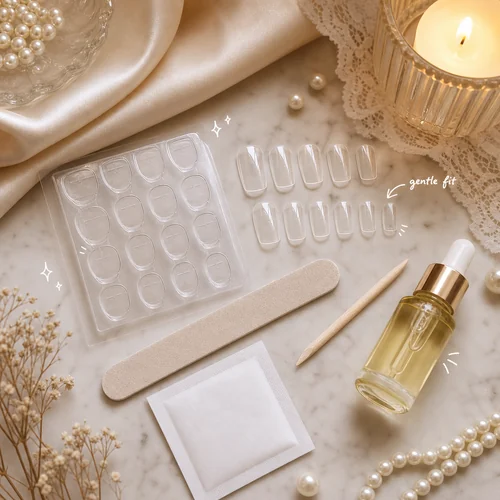
Glue, adhesive tabs, and comfort
On petite nail beds, adhesive choice changes comfort. Glue usually gives a longer hold, but it needs careful placement so it does not flood the skin around a small nail. Adhesive tabs can feel softer for short wear, content days, parties, or testing a new size. They are often easier to remove gently when you want to reuse the set.
If you are still deciding, read the LuxeClaw guide to press-on nails with adhesive tabs. For nail health, avoid forcing a press-on that pinches, hurts, or overlaps skin. The American Academy of Dermatology notes that artificial nail products and removal methods can irritate or weaken nails for some people, so a comfortable fit and gentle removal are worth prioritizing. You can read their dermatologist guidance on reducing artificial nail damage.
Quick fit checklist before you order
- Measure every nail in millimeters, not just one hand.
- Choose the size that covers the nail plate, not the skin.
- Dry-fit the tips before applying glue or tabs.
- File side edges lightly only when you need a tiny adjustment.
- Pick shorter shapes for daily wear if your nail beds are very petite.
- Remove and resize if anything feels tight, painful, or lifted.
The best set is the one you stop noticing because it feels natural. Press on nails for small nail beds can look soft, elegant, gothic, cute, bridal, or full sparkle when the size is right. Start with measurements, choose a shape that feels balanced, and let the art come after the fit.